Tuto proposed by RORO (Sète)
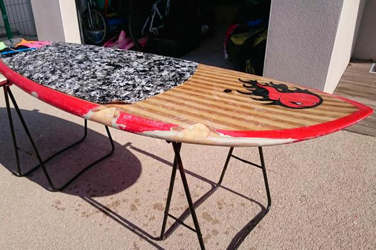
Arthur's OD had a ride in one of the dikes of our home spot recently...
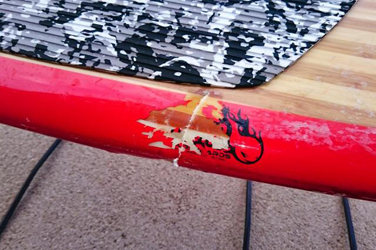
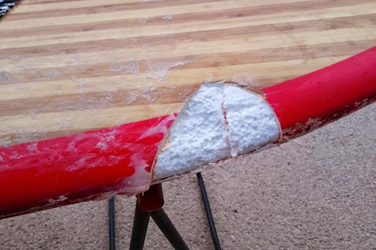
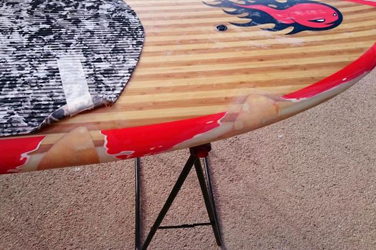
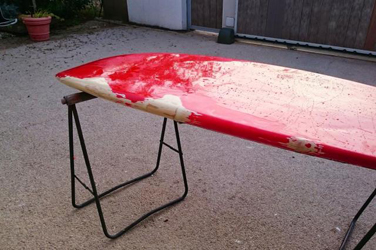
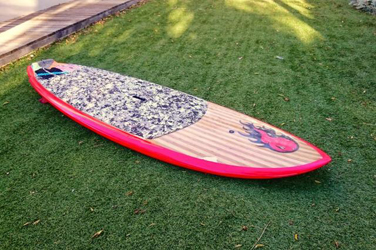
No injury for Arthur (who was a bit scared at the time), but 2 big farts on the rail of his OD. The last wave which entrained him behind the dam with a very close series which blocked him against the rocks:
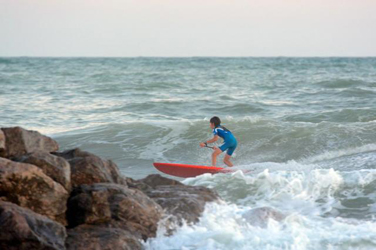
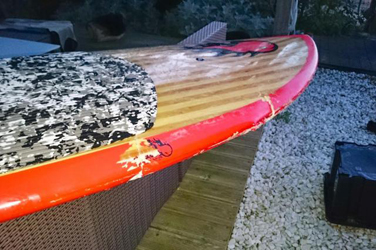
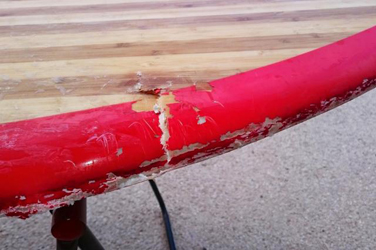
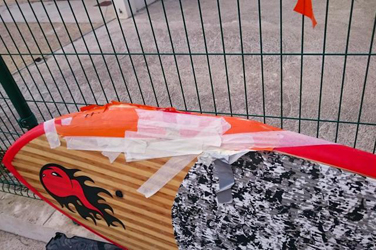
The board at the exit of the water
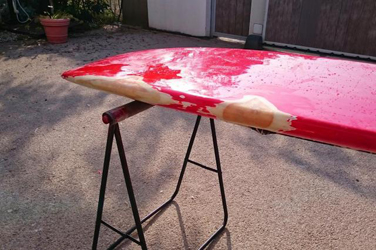
Step 1: Wound cleansing
With a Dremel type tool, I cut out all the damaged pieces of the sandwich and blow them up with a flat screwdriver or a metal scraper. Of course, this also removes some of the foam cake. The goal is to have no more damaged areas
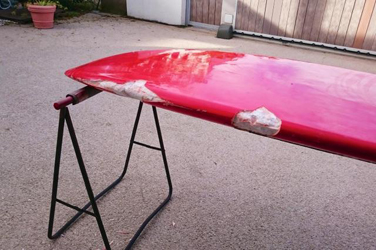
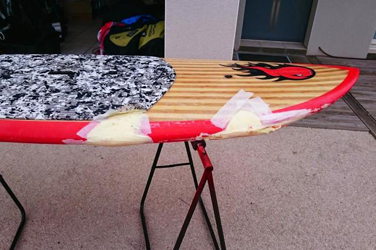
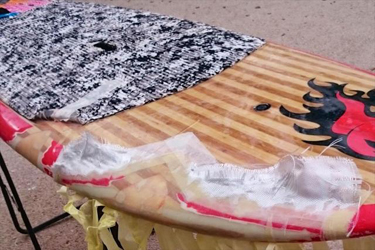
2nd step : we fill the holes of the foam cake
There are several methods for this step. Some cut large pieces of foam pad and insert them into the rail with a glue. They then reshape the rail with standard tools. On my side, I prefer to use the method regularly given on the forum by the bear: use foaming epoxy resin to fill the holes of the foam bar. With this method, the board may take a little weight (foaming epoxy is denser than the traditional foam pad) but you gain strength. As I only know how to make simple laminations (no sandwich) this added strength is not negligible I think.
The foam epoxy being quite liquid, the difficulty of this step is to make a kind of waterproof mold where the resin will be able to penetrate by gravity in all the areas. I use masking tape for the surfaces in contact with the resin.
I then cut holes big enough to inject the resin. I then consolidate the whole with a stronger plastic tape.
The foaming epoxy is expansive, but not "pushing". To avoid any overflow, I plug the whole thing (leaving room for expansion)
3rd step: removal and sanding of the foaming epoxy
I let it dry long enough this time (3 days in Paris...) but 24 hours should be enough to sand in good conditions.
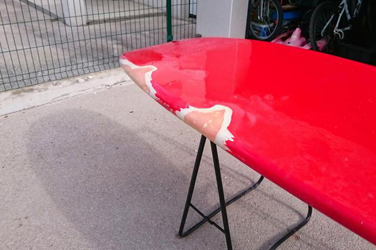
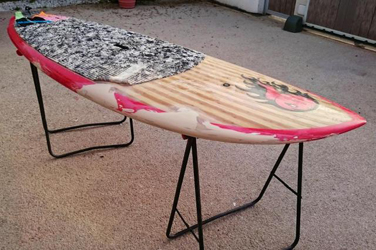
First, I remove my "mold":
It's not great (it has holes and gaps) but it should be easy to fix.
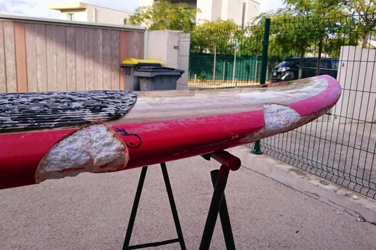
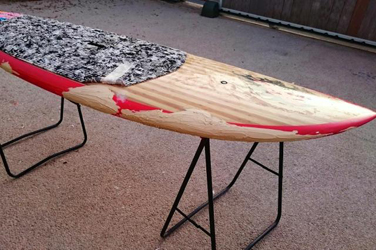
Here is the result after sanding:
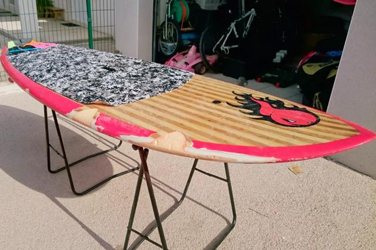
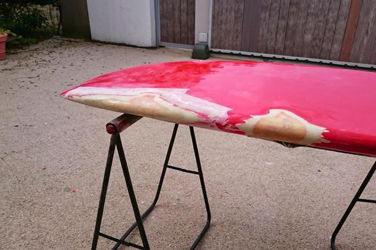
It's ok for the hull, but there are some small holes on the deck and on the rail. I didn't have enough time to go through the foam epoxy process again, so I filled these holes with putty. After sanding the putty :
4th step: stratification
During the sanding in the previous step, I took care to make a nice "scarf" (gradient sanding) all around the "wounds". It is done on the junction between the foaming epoxy and the old
laminate. It is this entire surface that will hold the new laminate to the old laminate and thus ensure the watertightness of the repair.
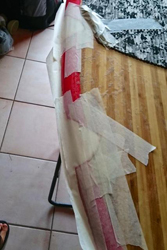
To protect the board, I place masking tape all around the areas to be repaired, taking care not to bite on the scarf:

For this repair, I used three layers of fiber. I just use the resin needed to soak the fiber between each layer (I soak the board before the first layer). At the end, the 3
layers of fiber are transparent and I can see the protective tape. I then cover the whole thing with masking tape to keep some pressure on the rail (lots of strips
perpendicular to the rail). This also allows to evacuate the excess of resin (a bit like tear cloth). Here is a picture taken after the drying process when I remove the tape:
You can see the boundary between the impregnated area and the dry fabric.
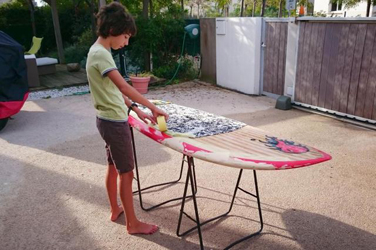
Step 5: Sanding and finishing
After 24 hours of drying, I sand starting with the perimeter of the repair. I remove the excess fiber and resin placed on top of the protective tape.
If all goes well, it can be removed quite easily
If necessary, I remove the remaining pieces of glue with gasoline F.
I then hand sand with water and medium grit on the entire repair to remove the biggest irregularities and to show the missing parts
I then putty the entire repair to fill in the imperfections
Then re-sanding (medium grain then fine grain with water)
In my case, I still had some very local imperfections after sanding. So I put a little bit of filler on some areas and finished the sanding with a very fine grain (600)

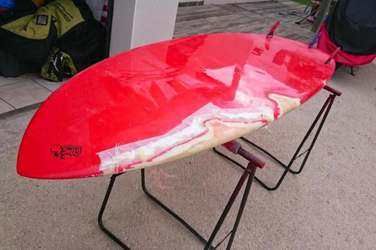
Finally comes the paint. I use the red spray can sold on the Gong website.
Masking:
Red paint :
Drying, partial removal of masking for varnish
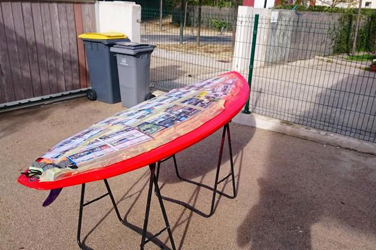
That's it, the board can finally go back in the water !!!!
Application area related to this tutorial:


