Creation of a fairing part
Tutorial proposed by POLUX (Gex)
Basic model

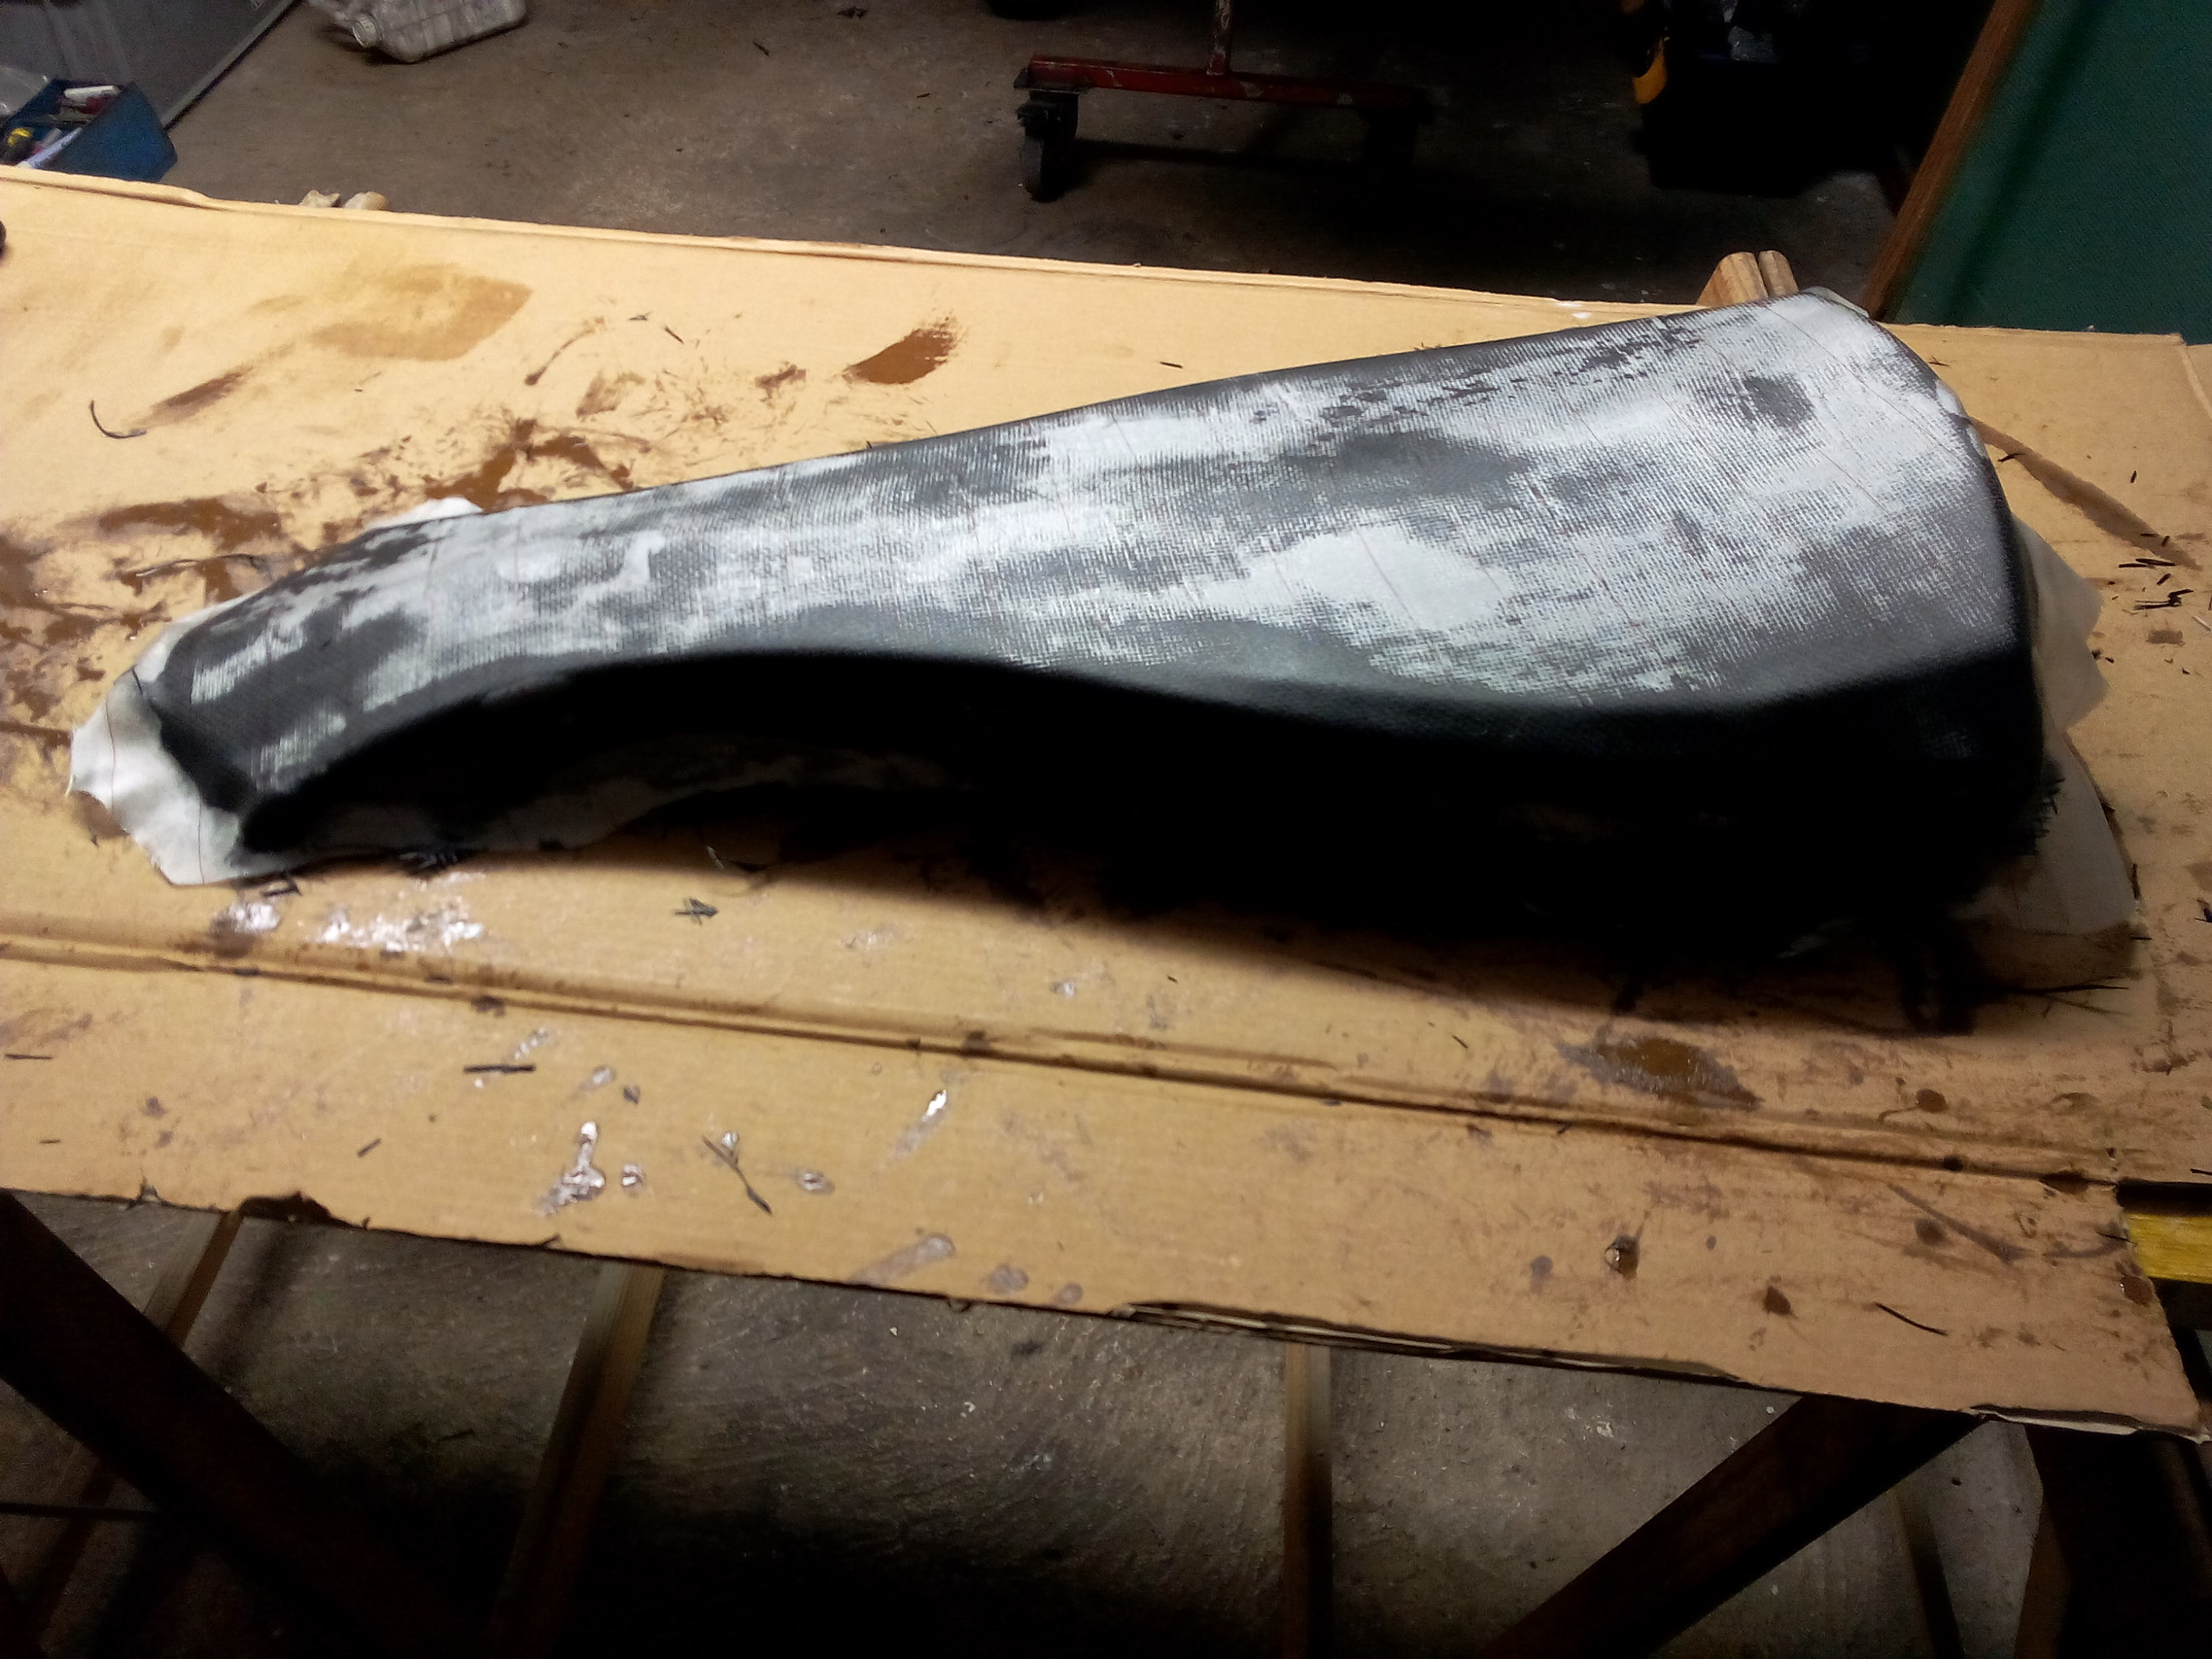
First, I will use the original piece as a mold.
In order not to damage it, and having forgotten to order a release agent, I will carefully apply some cling film properly taped to avoid resin infiltration and stretched correctly to avoid creases or bubbles.


Then, for a well-prepared work before having the gloves sticky, make the vacuum bag with Nylex and Sealtex leaving a 10cm margin (you have to think about the increase of the volume of the piece with Feltrex).
Also prepare the cuttings for the Peeltex and Feltrex tear away fabric.


Then, prepare the cuttings of the HR carbon fabric by not forgetting to cross the cuttings in order to increase the rigidity of your part, it is necessary to cross the weft of the fabric at each layer, and for the last layer to think well in which direction the weft of your fabric must be positioned for the final esthetism of your part (for this part, I left on six layers).
Preparation of the epoxy resin SR 8200 + standard hardener SD 7204.
Two solutions for mixing: either by weight (with a small accurate scale 100gr / 37gr), or by percentage (volume dosage 100/44). As I don't have a weighing scale, I opted for the second solution with a measuring cup. Once the mixture is calculated and well dosed, stir well.

Application on the matrix with the carbon fabric: soak the epoxy resin with a stiff brush. In order to impregnate the fabric, repeat the operation for each layer (crosswise). With a pair of scissors, you can cut the excess fabric at 1cm/1.5cm from the edge of the piece.

Then, it is necessary to apply on the piece of tear cloth and Feltrex, which I stapled between them all around leaving 2cm margin of the edge of the piece.
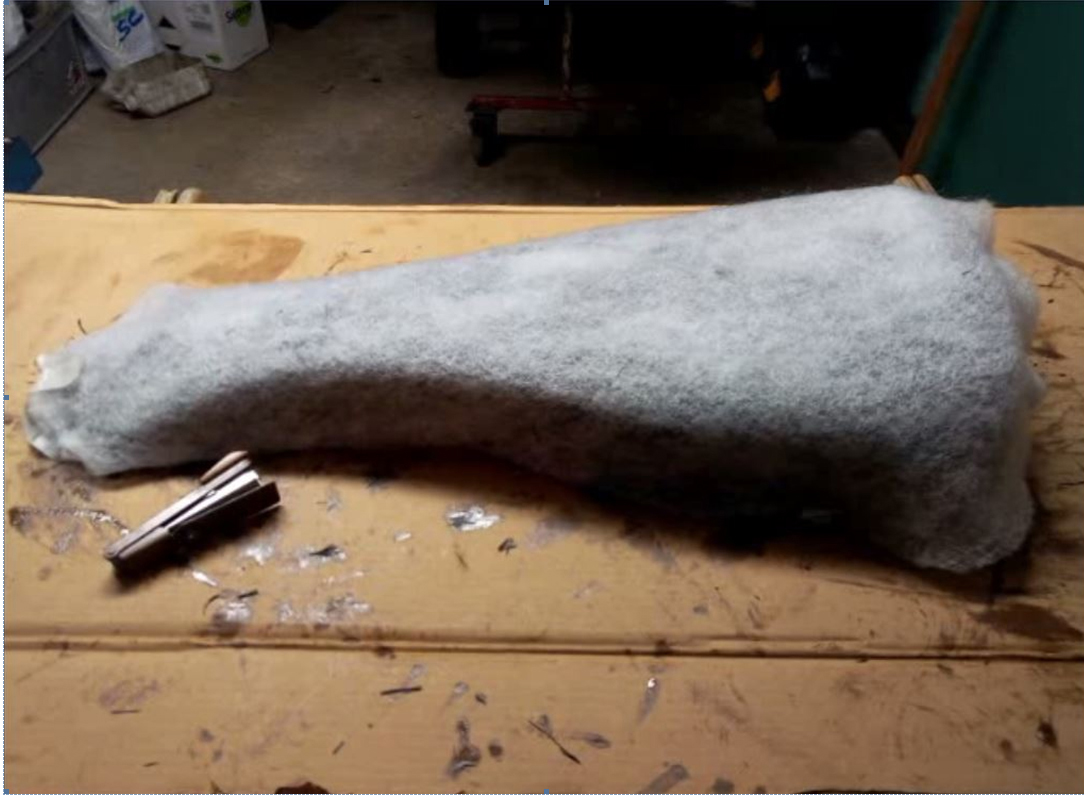
Once this operation is done, we can move on to the vacuum and drying operation. We put our piece in the vacuum bag, which we close carefully with the Sealtex. Do not forget the vacuum hose!

To make the vacuum, I used an old fridge motor, adapted a vacuum meter and an infusion valve to manage the suction, because at the time of the vacuum it is necessary to make sure of the good positioning of the part and that it does not deform it. It is necessary to put in place by pressing strongly on all the contours of the piece, as well as on the contours of the bag, in order to eliminate possible air leaks.

You can also see a pickle jar that I drilled two holes in the lid to serve as a resin catcher to prevent resin from being sucked into the pump! I sealed the pipes on the lid of the jar with Sealtex, it's going very well.
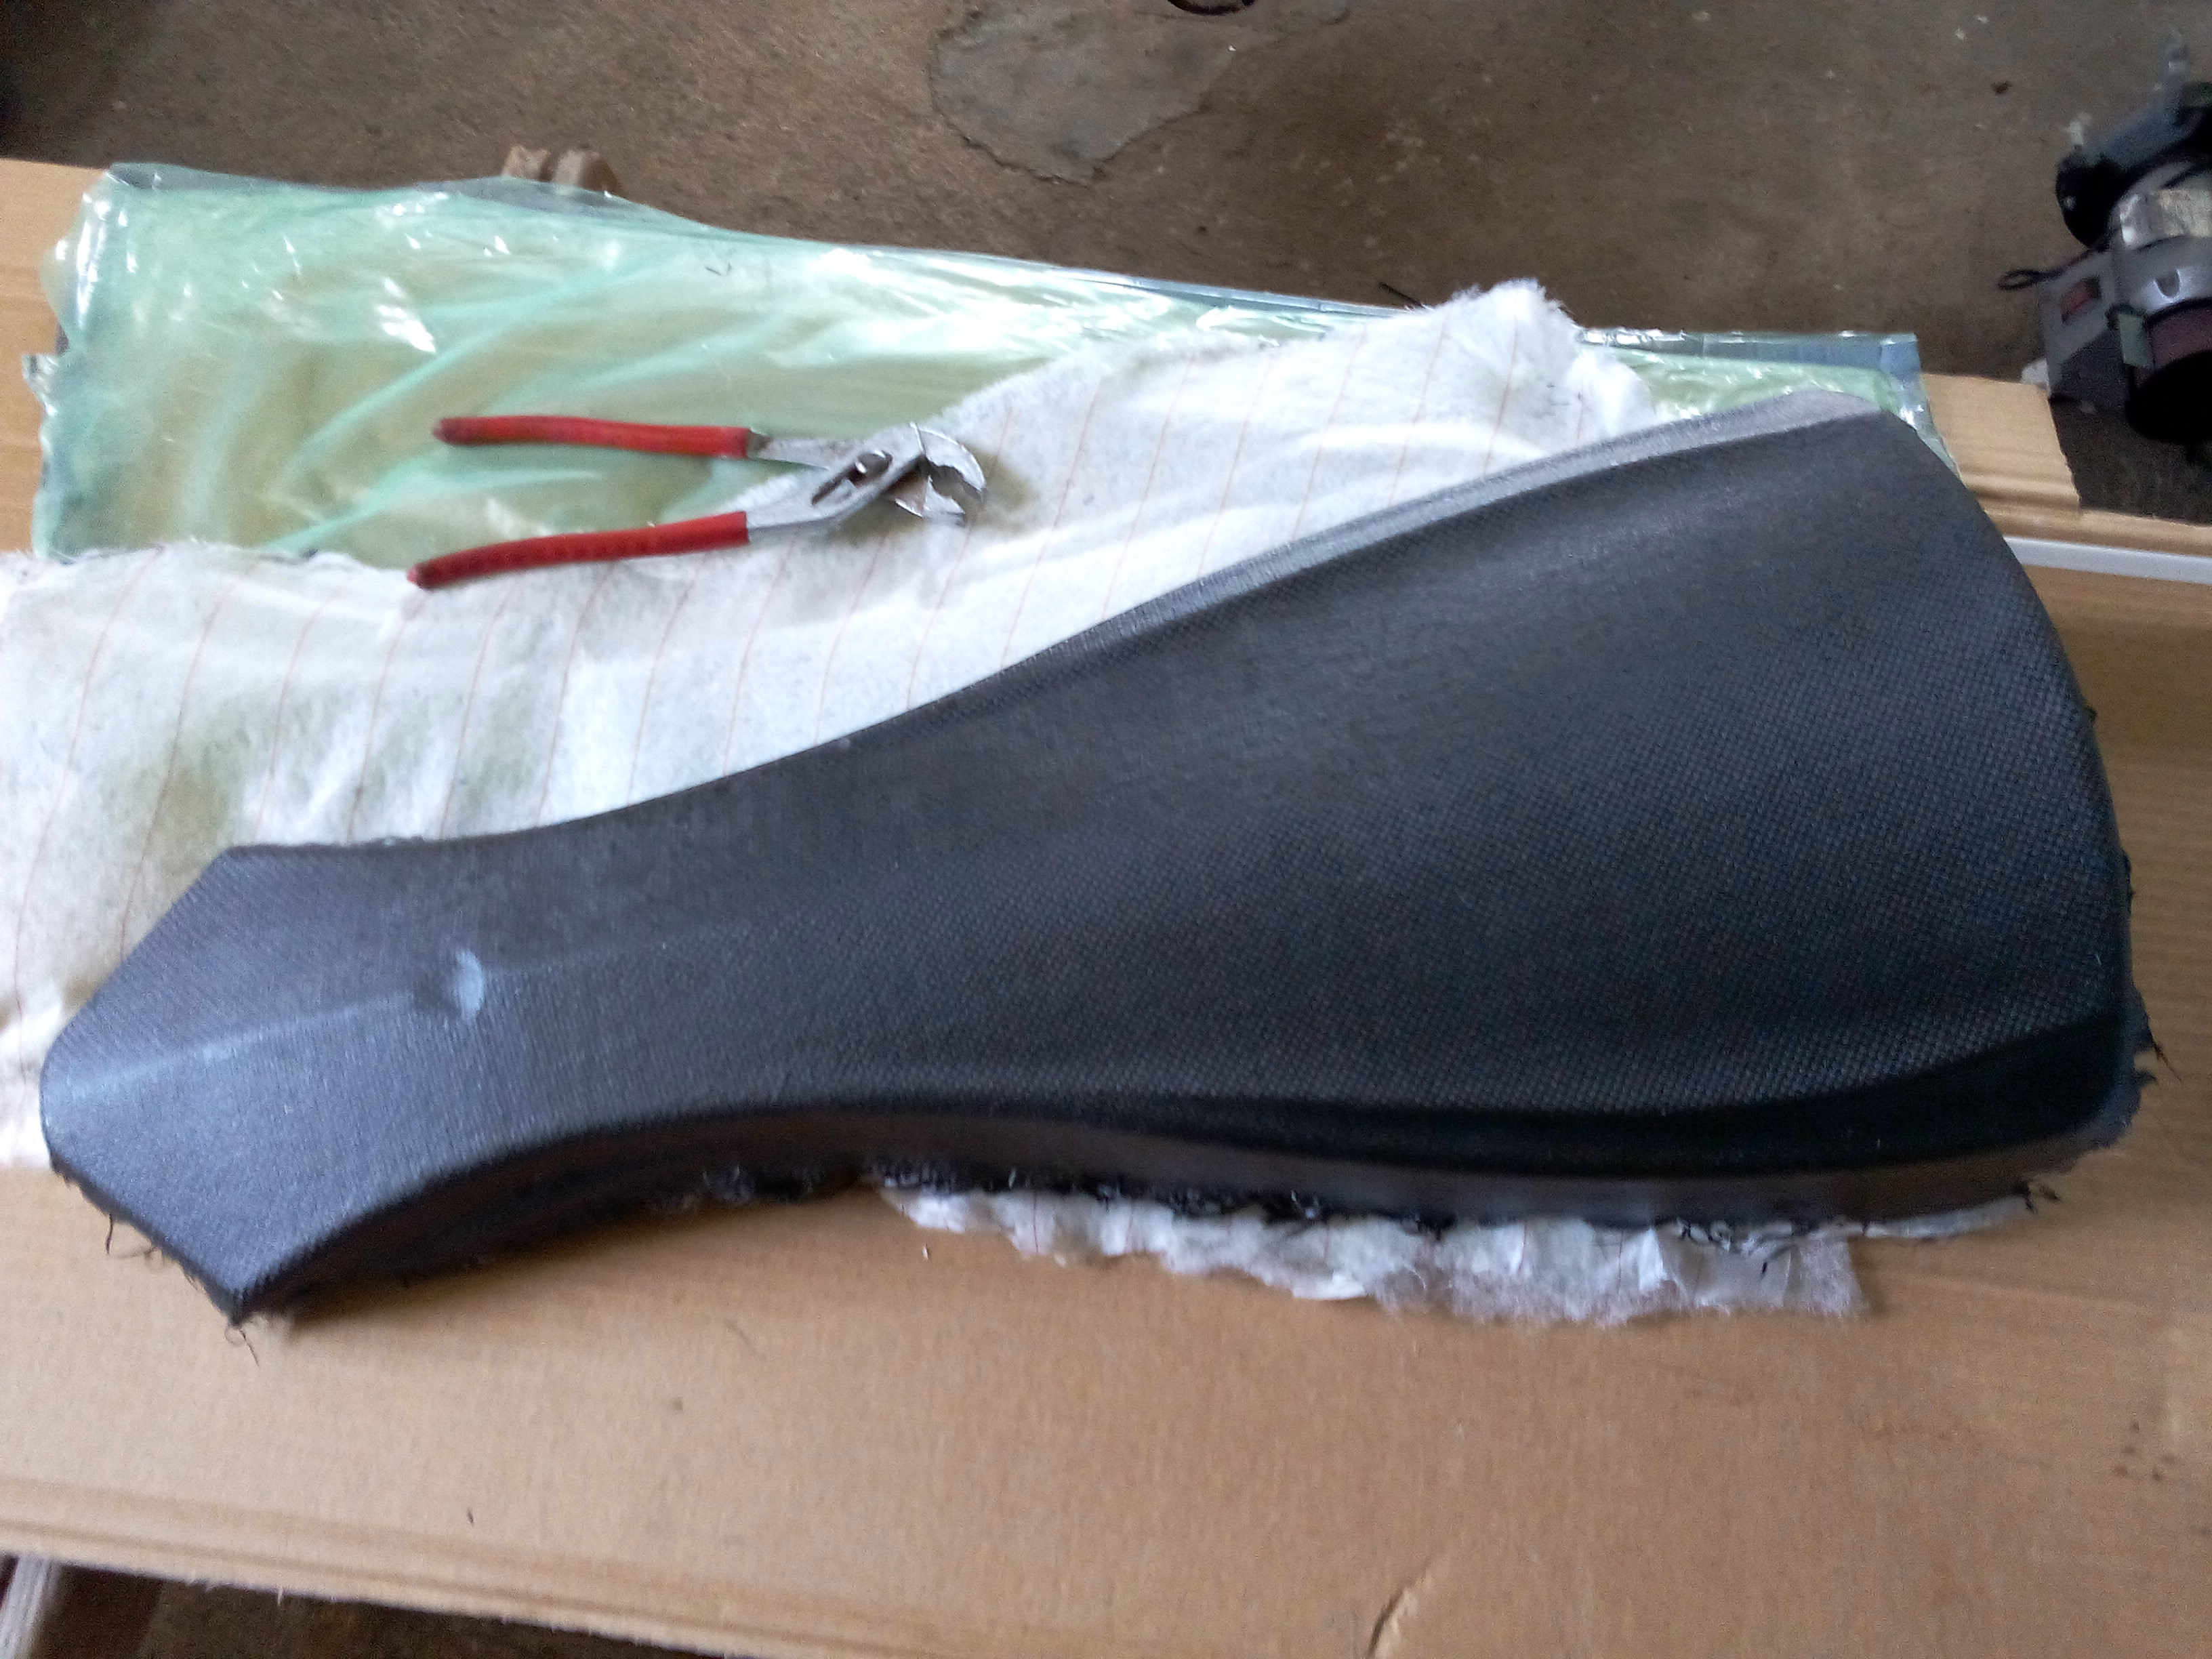
That's it, let it dry for six hours at room temperature. Then, take your piece out of the vacuum bag and beat yourself up with pliers to rip off the tear away fabric! (Watch out for the staples, they love meat!). Peel the original piece from the inside with a screwdriver intermittently all around.
Then let the piece rest for 12 hours, and since the size of my piece did not allow me to insert it into mom's oven, I positioned it on wedges over the wood stove at a temperature of 60°, let it simmer for 6 hours!

Once the cooking is finished, it is necessary to pass to sanding in order to have a beautiful completion...

To finish, I sprayed three coats of gloss varnish, between each coat sanded with 120 paper.
Areas of application related to this tutorial :


